You can receive a perfectly fabricated restoration from your lab partner, but its ultimate success hinges on the final step in your operatory. The bond you create is the critical foundation that ensures years of function for your patient. With zirconia, that foundation is built on a specific set of clinical procedures that create both mechanical and chemical retention. From proper tooth preparation and margin design to effective surface decontamination after try-in, every detail matters. This article breaks down the complete workflow for a predictable and durable zirconia crown cementation, ensuring your clinical work matches the quality of the restoration.
Cementing zirconia crowns might seem straightforward, but small missteps can lead to significant issues like debonding, marginal leakage, or even restoration failure. Since zirconia behaves differently from other ceramic materials, specific cementation protocols are required to optimize retention and longevity. Understanding how zirconia interacts with different cements and surface treatments can make a huge difference in clinical success. Read on for best practices when working with zirconia crown cementation.
Understanding the Zirconia You’re Working With
Before you can master the cementation process, it’s crucial to know which type of zirconia you’re handling. Not all zirconia is created equal; different formulations offer varying levels of strength and translucency, which influences how you should approach the case. The material’s properties dictate its ideal clinical application, whether it’s for a posterior crown that needs to withstand heavy occlusal forces or an anterior crown where aesthetics are paramount. Knowing the difference between 3Y, 4Y, and 5Y zirconia will help you and your lab partner, like us at Next Dental Lab, make the best choice for your patient. This decision directly impacts the preparation and cementation protocol required for a successful, long-lasting restoration.
3Y Zirconia: The Strength-Focused Option
When you need maximum durability, 3Y zirconia is your go-to material. This is the original, toughest type of zirconia, often referred to as tetragonal zirconia. According to Oral Arts Dental, “This is the strongest type (1000-1500 MPa). It’s best for situations needing maximum strength, like when there’s not much tooth left to work with.” Its high flexural strength makes it an excellent choice for posterior crowns, multi-unit bridges, and cases with minimal occlusal clearance. While its opacity makes it less ideal for highly aesthetic anterior cases, its sheer resilience ensures it can handle the toughest biting forces without fracturing, providing peace of mind for both you and your patient.
4Y Zirconia: A Balance of Strength and Aesthetics
For cases that require a blend of durability and a natural appearance, 4Y zirconia is an excellent middle-ground option. This material contains a higher amount of yttria, which increases its translucency compared to 3Y zirconia without a significant drop in strength. It offers a “good mix of strength (600-1050 MPa) and natural look,” making it versatile enough for “both for front teeth (aesthetics) and back teeth (strength).” This versatility makes 4Y zirconia a popular choice for a wide range of restorations, from single anterior or posterior crowns to smaller bridges. It provides a reliable and aesthetically pleasing outcome that satisfies the demands of many common clinical situations.
5Y Zirconia: The Aesthetic Choice
When aesthetics are the top priority, especially in the anterior region, 5Y zirconia is the clear winner. This high-translucency material, also known as cubic zirconia, contains the highest percentage of yttria, which gives it an optical clarity that closely mimics natural enamel. While it has the lowest flexural strength of the three types, it is still quite strong. As one source notes, “This type is the clearest (500-700 MPa), looking most like natural teeth. It’s used when appearance is most important, especially for front teeth.” It’s the perfect material for anterior crowns, veneers, and inlays where a seamless, beautiful smile is the ultimate goal.
Why Zirconia Cementation is Different
Zirconia’s unique composition is what makes it so strong, but it’s also why you can’t treat it like other ceramics during cementation. Unlike porcelain or lithium disilicate, which are silica-based and have a glass component, zirconia is a crystalline oxide. This fundamental difference means that traditional bonding techniques designed for glass-ceramics simply don’t work on zirconia. Attempting to use them can lead to a weak bond and, ultimately, restoration failure. Understanding this key distinction is the first step toward adopting a protocol that ensures a strong, durable bond and predictable clinical success with your zirconia restorations.
The Ineffectiveness of Acid Etching and Silane
If you’re used to working with glass-ceramics, your go-to surface preparation methods likely involve hydrofluoric acid etching followed by a silane coupling agent. However, these steps are ineffective for zirconia. A review in the National Center for Biotechnology Information explains that “common ways to prepare surfaces, like using silane or acid etching, don’t work on zirconia because it doesn’t have a glass-like part that these treatments need to work.” Without a silica phase, the acid has nothing to etch, and the silane has nothing to chemically bond to. This means you need to rely on different methods, like air abrasion and specialized primers, to achieve a strong micromechanical and chemical bond.
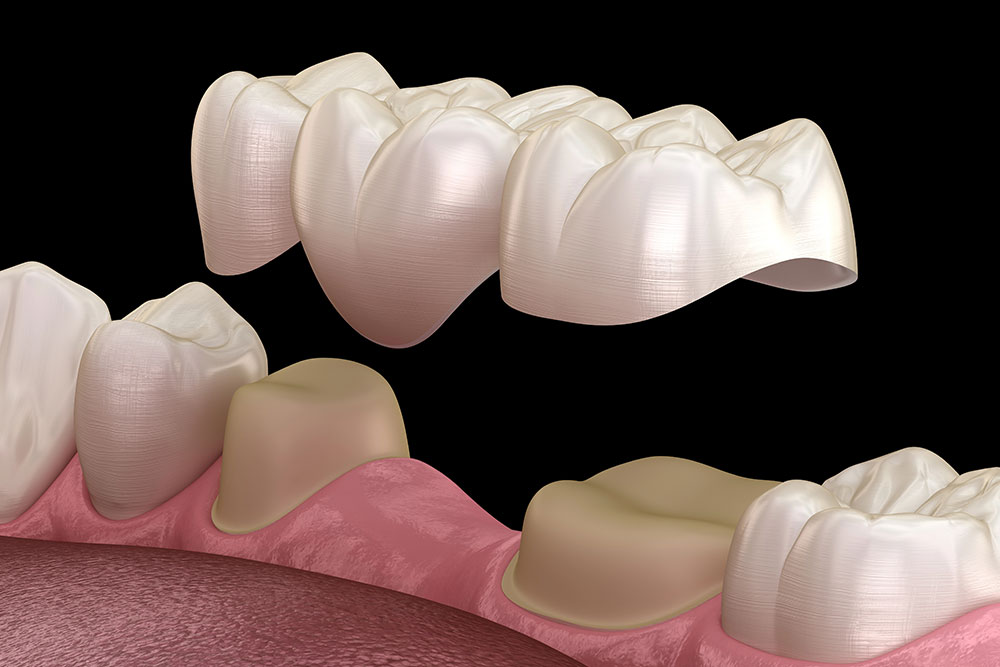
Step 1: Prepare the Tooth for Optimal Adhesion
A successful cementation starts long before you mix the cement. Proper tooth preparation is the foundation for any long-lasting restoration, and this is especially true for zirconia crowns. Creating the right amount of space and designing the correct margin geometry not only ensures a passive fit but also contributes significantly to the overall retention and strength of the final crown. Taking the time to refine your prep can prevent common issues like debonding or marginal leakage down the road. It also helps your dental lab create a more precise and anatomically correct restoration, leading to better patient outcomes and fewer adjustments at the seating appointment.
Minimal Tooth Reduction Guidelines
One of the great advantages of zirconia is its strength, which allows for more conservative tooth preparation. According to Glidewell, the guidelines are quite minimal. “For BruxZir Full-Strength crowns, aim for 1.0 mm of tooth removal, but 0.5 mm is okay. For BruxZir Esthetic crowns, aim for 1.25 mm of tooth removal, but 0.7 mm is okay.” Following these conservative guidelines helps preserve as much healthy tooth structure as possible, which is always the primary goal. Be sure to create adequate occlusal clearance to prevent excessive stress on the restoration, ensuring it has enough thickness to withstand functional forces without fracturing.
Margin Design: Chamfer vs. Shoulder
The design of your preparation margin is another critical factor for success. Zirconia restorations perform best with smooth, rounded margins that distribute stress evenly. The recommended margin design is a chamfer or a shoulder. As Glidewell advises, “The edges of the tooth preparation should be shaped like a chamfer (a sloped edge) or a shoulder (a flat ledge).” Avoid sharp angles or feather-edge margins, as these can create stress points that may lead to fractures in the zirconia. A well-defined chamfer is often preferred because it provides excellent support for the restoration while still being relatively conservative.
The Role of Desensitizers
Applying a desensitizing agent after preparation can offer a dual benefit. First, it helps prevent post-operative sensitivity for the patient, which is always a plus. Second, certain desensitizers can actually improve the bond strength of your final restoration. For instance, research from Oral Arts Dental suggests that “applying a desensitizer (like Gluma) can increase bond strength by up to 30%.” This simple step not only enhances patient comfort but also contributes to a more secure and durable bond between the tooth and the zirconia crown, making it a valuable addition to your cementation workflow.
Step 1: Ensure a Perfectly Clean Surface
 Contamination is one of the leading causes of bonding failure. After try-in, zirconia crowns must be cleaned thoroughly. Even invisible saliva or blood residues can interfere with cement adhesion. Tip: Use a zirconia-specific cleaner or a sodium hypochlorite solution after try-in to decontaminate the crown surface.
The Impact of Saliva and Blood Contamination
During the try-in phase, the internal surface of a zirconia crown inevitably comes into contact with saliva and sometimes blood. This isn’t just a minor issue; it’s a major roadblock to successful bonding. Saliva contains phosphate ions that bind strongly to the zirconia surface, creating a contaminated layer that prevents the dental cement from forming a secure chemical bond. Research shows that this contamination can reduce the bond strength by as much as 50%. Failing to properly decontaminate the crown after try-in is one of the most common reasons for cement failure, leading to debonding down the road. Think of it as trying to glue two wet surfaces together—it simply won’t hold.
Proper Cleaning Agents and What to Avoid
Since contamination is guaranteed, using the right cleaning agent is non-negotiable. The most effective method is to use a dedicated zirconia cleaner, such as Ivoclean or ZirClean. These solutions are specifically designed to remove the phosphate contaminants left by saliva. A simple 20-second application followed by a thorough rinse and dry is all it takes to restore the surface for optimal bonding. However, it’s equally important to know what to avoid. Never use phosphoric acid to clean a zirconia crown. While it’s a go-to for etching other materials, it actually adds more phosphate ions to the zirconia, making the contamination worse. Similarly, traditional methods like acid etching and silane application are ineffective because zirconia lacks the glass matrix they need to work.
Adhesive or Conventional? How to Choose Your Method
Depending on your clinical goals and prep design, Zirconia allows for both conventional and adhesive cementation.
- Conventional cementation (with RMGI or glass ionomer) is often suitable for retentive preparations and posterior crowns.
- Adhesive cementation is ideal for short preps or when additional retention is needed. It requires more steps but significantly enhances bond strength.
Choose your method based on the case—don’t default to one over the other.
Step 3: Sandblast the Intaglio for a Stronger Bond
Air abrasion with aluminum oxide is essential before adhesive cementation. This roughens the inner surface, increasing mechanical retention. Ensure the following:
- Use 30–50 micron particles
- Pressure: 1.5–2.5 bars
- Keep a safe distance (around 10 mm)
Be careful not to damage margins or over-abrade thin areas.
Step 4: Apply an MDP-Containing Primer
Zirconia doesn’t etch like glass ceramics. Instead, use an MDP-containing primer to promote chemical bonding between the crown and the cement. Apply the primer after sandblasting, and allow proper dwell time as recommended by the manufacturer before seating### What is MDP and Why is it Essential? MDP, which stands for 10-Methacryloyloxydecyl Dihydrogen Phosphate, is a functional monomer that acts as a powerful adhesive bridge. It’s the key ingredient that allows resin cements to form a strong, stable chemical bond with the zirconia surface. Think of it as the ultimate matchmaker between two materials that wouldn’t otherwise connect effectively. Since zirconia is a non-silica-based ceramic, it doesn’t respond to traditional hydrofluoric acid etching or silane primers. MDP solves this problem by creating a durable chemical link. Research indicates that applying an MDP-containing primer after sandblasting the intaglio surface is one of the most effective ways to achieve high bond strength and ensure the long-term success of the restoration. ### Cements to Avoid with Zirconia Choosing the right cement is just as important as knowing which ones to skip. For zirconia restorations, it’s best to avoid cements that rely solely on mechanical retention without any chemical bonding capabilities. Traditional cements like zinc phosphate, polycarboxylate, and conventional glass ionomers generally lack the necessary bonding strength for reliable, long-term adhesion to zirconia. These materials were not designed to bond with non-etchable ceramic surfaces and can lead to higher rates of debonding and marginal failure over time. Sticking to resin-modified glass ionomers (RMGIs) for conventional cementation or resin cements with an MDP primer for adhesive cementation will give you a much more predictable and durable outcome for your zirconia crowns.
Step 5: Keep the Field Isolated and Dry
Moisture control is crucial during zirconia crown cementation. Adhesive systems are particularly sensitive to contamination. If isolation is tricky, consider using a rubber dam or retraction system to create a clean environment.
Step 6: Follow the Cement’s Instructions to the Letter
Not all resin cements are the same. Some are self-adhesive, while others require a bonding agent. Missteps in curing time or application order can compromise retention.
- Don’t skip the manufacturer’s instructions
- Avoid premature curing—light-cure only after seating
- Clean excess cement at the gel stage to protect margins
The “Tack Cure” Technique for Easy Cleanup
Cleaning up excess cement can be one of the most tedious parts of placing a crown, but the “tack cure” technique makes it much simpler. After you’ve seated the zirconia crown, apply a quick burst of light—just one to two seconds—to the cement. This doesn’t fully cure it; instead, it brings the cement to a gel-like state. At this stage, the excess material is easy to peel away cleanly from the margins with an explorer or scaler. This approach prevents you from having to chip away at rock-hard cement later, which risks damaging the margin or irritating the gingiva. It’s a small step that ensures a clean, efficient finish and helps maintain the integrity of the final restoration.
Step 7: Confirm a Perfect Fit Before Cementing
Always confirm that the zirconia crown seats fully before cementation. Incomplete seating due to interferences or tissue impingement can lead to uneven stress and debonding. Check contacts, margins, and occlusion. Make adjustments ahead of time, not after cementation.
Achieve Lasting Results with Proper Cementation
Zirconia is one of modern dentistry’s strongest and most reliable materials—but only when cemented correctly. Following these best practices helps ensure predictable retention, minimal sensitivity, and excellent aesthetics for your patients. At Next Dental Labs, we support your success by delivering high-quality zirconia restorations with precision and consistency, at prices more than 50% below the competition. When your lab partner gets it right, your cementation process becomes that much smoother.
Frequently Asked Questions
Why can’t I just use my usual acid etch and silane primer on a zirconia crown? Zirconia has a different chemical makeup than glass-ceramics like porcelain or lithium disilicate. It’s a crystalline oxide and lacks the silica (glass) component that hydrofluoric acid needs to create an etch pattern. Similarly, silane primers are designed to bond to that silica phase, so they are ineffective on zirconia. You need a different approach, like sandblasting and an MDP primer, to create a strong bond.
What is the most critical step to prevent a zirconia crown from debonding? Properly decontaminating the crown’s internal surface after try-in is arguably the most important step. Saliva contains phosphate ions that bind to the zirconia and prevent the cement from forming a chemical bond, which can drastically reduce bond strength. Using a dedicated zirconia cleaner to remove these contaminants before priming is essential for a predictable, long-lasting result.
Do I always need to adhesively bond zirconia, or is conventional cementation okay? You don’t always need to use an adhesive protocol. The choice depends on your tooth preparation. If you have a retentive prep with good height and parallel walls, a conventional cement like a resin-modified glass ionomer (RMGI) is often sufficient. For shorter preps or situations where you need maximum retention, an adhesive cementation protocol with an MDP primer is the recommended path.
What exactly is an MDP primer, and why is it necessary for zirconia? MDP is a special adhesive monomer that acts as a chemical bridge between the zirconia and the resin cement. Think of it as a double-sided connector; one end chemically bonds to the zirconia oxide, and the other end bonds to the cement. Since you can’t etch zirconia in the traditional sense, this primer is the key to creating a strong and stable chemical adhesion.
Is sandblasting the inside of the crown really necessary before cementation? Yes, if you are using an adhesive bonding protocol, sandblasting is a crucial step. This process, also called air abrasion, uses fine aluminum oxide particles to gently roughen the internal surface of the crown. This creates microscopic texture, which increases the surface area and provides the mechanical retention, or grip, needed for the cement to lock securely into place.
Key Takeaways
- Prepare the crown’s surface correctly: A strong bond depends on a specific protocol, so always decontaminate the crown after try-in, sandblast the interior to create mechanical grip, and apply an MDP-containing primer for a durable chemical connection.
- Build a strong foundation with proper prep: Ensure a long-lasting restoration by following conservative reduction guidelines and designing a smooth chamfer or shoulder margin to distribute biting forces evenly.
- Choose your cement and primer wisely: Zirconia requires specific chemistry for a secure bond, so use resin cements with an MDP primer for adhesive cases and avoid agents like phosphoric acid or silane, which can weaken the final result.