You’ve done everything right. The implant placement was flawless, osseointegration was successful, and the patient’s healing has been textbook. Yet, when you seat the final crown, something is missing. The gumline doesn’t look quite natural, and the restoration lacks that seamless transition you see with a healthy tooth. This common frustration often comes down to one critical, and sometimes overlooked, detail: the implant emergence profile. It’s the art and science of shaping how the restoration meets the soft tissue. Mastering this contour is the key to moving beyond functional success and achieving the truly esthetic, long-lasting results your patients expect, especially in the anterior zone.
The implant looked perfect on the X-ray. Its placement was spot on, and healing was smooth. Yet, something felt off when the final crown was seated. The soft tissue hadn’t adapted quite right, and the result didn’t match the natural gum contour of the adjacent teeth. This is where the emergence profile becomes a game-changer. Beyond just placing the implant in the right position, shaping how a restoration meets the gumline can be the difference between a functional implant and one that truly looks and feels like a natural tooth. If you want lasting aesthetics and tissue health, properly adjusting the emergence profile is essential.
What Is an Implant Emergence Profile?
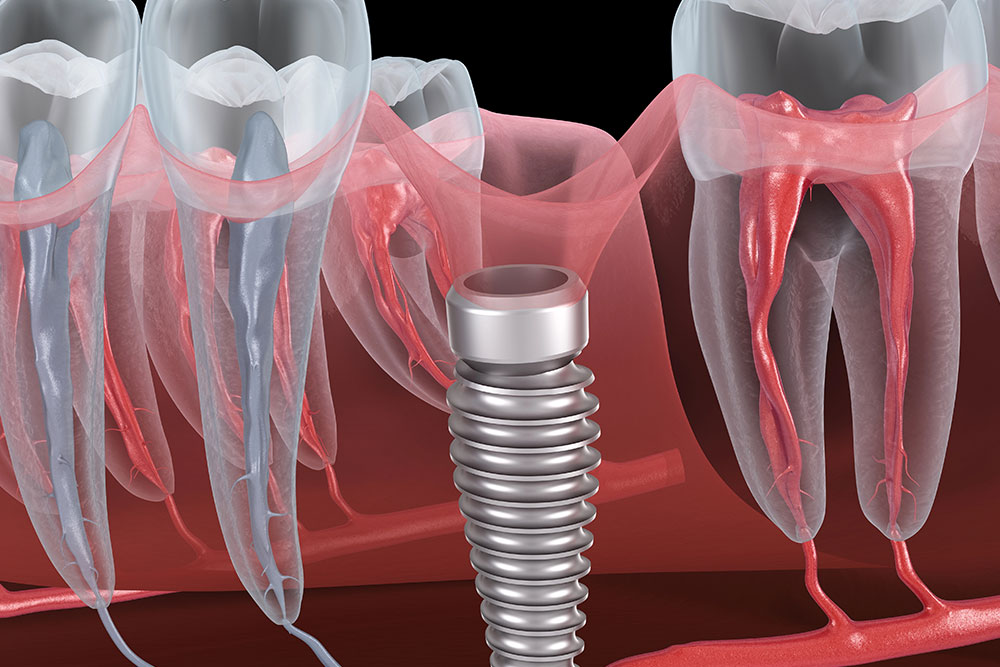 The emergence profile refers to the shape of the crown or abutment as it rises from the implant platform through the gum tissue. This contour is critical because it determines how the surrounding tissue will adapt and heal. Done right, it mimics the way natural teeth emerge from the gums, resulting in a lifelike, functional restoration. There are two key components:
- Subgingival emergence profile: From the implant platform to the free gingival margin
- Supragingival profile: From the gum line up to the crown
The Two Components of an Emergence Profile
Biological Contour (BC)
The biological contour is all about maintaining the health of the surrounding tissues. Think of it as the foundation that supports the entire restoration. This contour directly influences how the gums and bone adapt to the implant. As research highlights, “The emergence profile and its angles are very important. They help make implant-supported teeth look natural and keep the gums and bone around the implant healthy.” A well-designed biological contour prevents excessive pressure on the bone and allows the soft tissue to form a tight, protective seal around the abutment. This is crucial for preventing inflammation and ensuring the long-term stability of your implant cases.
Esthetic Contour (EC)
While the biological contour works behind the scenes, the esthetic contour takes center stage. This is the visible part of the profile that shapes the gums and gives the final restoration its natural appearance. A properly formed esthetic contour is key to achieving a seamless blend with the adjacent teeth. According to one study, a good emergence profile not only helps the gums stay healthy but also “stops food from getting stuck, helps create natural-looking gum shapes between teeth, and makes it easier for patients to clean their teeth.” This highlights how the esthetic contour delivers both on visual appeal and practical, functional benefits that your patients will appreciate every day.
Why Shaping the Emergence Profile Is Crucial for Success
Without a well-shaped emergence profile, implants may look bulky, cause soft tissue collapse, or lead to poor hygiene access. On the other hand, a properly adjusted profile:
- Promotes soft tissue stability
- Enhances esthetics, especially in anterior restorations
- Reduces plaque accumulation and inflammation
- Supports long-term implant success
Impact on Gum and Bone Health
The shape of an emergence profile does more than guide the soft tissue for aesthetic purposes; it directly influences the underlying biological structures. A well-designed profile works in harmony with the patient’s anatomy to support long-term stability, while a poorly designed one can set off a chain reaction of complications. From gum recession to bone loss, the contour of the restoration as it emerges from the implant is a critical factor in the overall health and longevity of the entire implant system. Getting this right is fundamental to preventing future problems and ensuring a successful, lasting outcome for your patients.
Minimizing Gum Recession
One of the most immediate and visible consequences of a poorly designed emergence profile is gum recession. The shape of the abutment and crown puts pressure on the surrounding soft tissue, and if that pressure is excessive or improperly placed, it can cause the gums to pull back. Research from the European Federation of Periodontology highlights this risk, noting that implants with a convex emergence profile have a significantly higher chance of mid-facial mucosal recession compared to those with a concave profile. By creating a profile that gives the tissue adequate space, you can maintain the gumline and prevent the aesthetic and hygienic issues that come with recession.
Protecting the Biologic Width
The biologic width is the crucial space your body naturally maintains for healthy gum tissue to attach to the tooth or implant. A poorly designed emergence profile can disrupt this delicate area, leading to inflammation and subsequent bone loss. According to a comprehensive review in PMC, this space is vital, and an improper profile can violate it. This is why the design of high-quality dental implants and custom abutments is so important. A profile that is too wide or emerges at a sharp angle can physically impinge on the biologic width, triggering a defensive response from the body that ultimately compromises the stability of the implant.
Managing Long-Term Bone Levels
Ultimately, the goal of any implant procedure is to achieve and maintain stable bone levels for the life of the restoration. Stable bone is the foundation for everything else—function, soft tissue support, and aesthetics. The emergence profile plays a key role in this long-term stability. As noted in PMC, “keeping the bone level stable around a dental implant is crucial for the implant to work well… and last a long time.” By preventing chronic inflammation and protecting the biologic width, a carefully shaped emergence profile helps preserve the bone around the implant, ensuring a durable and successful outcome that stands the test of time.
Understanding Emergence Profile Shapes
The emergence profile isn’t a one-size-fits-all concept. Different clinical situations call for different shapes to achieve the best aesthetic and biological results. The three primary shapes—concave, convex, and straight—each have distinct characteristics and applications. Understanding when and how to use each one allows you to customize the restoration to the specific needs of the patient, whether you’re working on a highly visible front tooth or a functional molar in the back. Choosing the right profile is a key step in creating a restoration that is both beautiful and biologically sound.
Concave Profile
A concave profile curves inward from the implant platform, creating a gentle, scalloped shape that gives the soft tissue more room. This design is often the preferred choice for the aesthetic zone, particularly for front teeth. By providing extra space, a concave profile encourages the growth of thicker, healthier gum tissue, which helps create a more natural-looking emergence and better papillary support. As research in PMC points out, this inward curve is beneficial because it helps the gums achieve a favorable contour, mimicking the appearance of a natural tooth emerging from the gingiva and supporting a stable, long-lasting aesthetic result.
Convex Profile
In contrast, a convex profile curves outward, pushing against the surrounding soft tissue. While this shape can sometimes be used to fill out the gingival space, it must be handled with extreme caution. A profile that is too convex applies excessive pressure to the gums, which can restrict blood flow and lead to tissue thinning and recession over time. The European Federation of Periodontology confirms that “convex emergence profiles significantly increase the risk of gum recession around implant crowns in the aesthetic zone.” For this reason, this shape is generally avoided, especially in areas where aesthetics are a primary concern for the patient.
Straight Profile
A straight, or neutral, emergence profile follows a direct line from the implant platform to the crown margin without any significant inward or outward curvature. This straightforward design is most commonly used for posterior teeth, where aesthetics are less critical and ease of cleaning is a higher priority. A straight profile is less likely to impinge on the surrounding tissues and creates a smooth surface that is easier for the patient to maintain with regular brushing and flossing. This design prioritizes function and hygiene, making it a reliable and practical choice for molars and premolars where long-term health is the main objective.
4 Techniques for Perfecting the Implant Emergence Profile
1. Start with Custom Healing Abutments
Start by shaping the tissue early with custom healing abutments. These are tailored to match the final crown’s contours, encouraging the gum tissue to adapt gradually and predictably.
2. Fine-Tune with Provisional Crowns
Provisional restorations are critical for fine-tuning the emergence profile. You can progressively modify the contour of a temporary crown to guide tissue growth until you achieve the desired shape. This also gives the patient a preview of the final aesthetics.
3. Plan Ahead with Digital Workflows
Digital workflows allow for precise emergence profile design before the implant is ever placed. At Next Dental Labs, we support digital planning to help you design abutments and provisionals that match both the anatomical and esthetic demands of the case.
4. Prioritize Gentle Soft Tissue Management
Work gently around the soft tissues. Techniques such as platform switching and subcrestal placement can offer more flexibility for sculpting the emergence profile over time.
Clinical and Design Recommendations
Achieving a natural-looking and healthy emergence profile isn’t about luck; it’s about strategy. By incorporating a few key considerations into your clinical workflow, you can consistently produce restorations that blend seamlessly with the surrounding tissue. These recommendations focus on proactive planning and careful execution, from the initial implant placement to the final restoration. Thinking about the final contour from day one sets the stage for long-term stability and esthetics. It involves understanding the patient’s unique anatomy, leveraging modern tools, and handling the soft tissue with care. This approach not only improves the final outcome but also makes the entire process more predictable and efficient for both you and your patient.
Plan from the Start
The ideal emergence profile begins long before the final crown is seated. As one study notes, “Digital workflows allow for precise emergence profile design before the implant is ever placed.” By planning the final restoration from the outset, you can reverse-engineer the entire process, ensuring the implant position, abutment design, and provisional crown all work together to shape the tissue correctly. This proactive approach minimizes surprises and reduces the need for extensive adjustments later. Using digital tools, you can visualize the final outcome and create a surgical guide that places the implant in the perfect position to support the desired soft tissue contour. At Next Dental Lab, we make it easy to submit your digital cases, helping you integrate this crucial planning phase into your workflow seamlessly.
Consider Gum Thickness and Implant Choice
A patient’s gingival biotype—the thickness of their gum tissue—plays a significant role in the final esthetic outcome. Thicker tissue is more forgiving and resilient, while thin tissue is prone to recession and can show the underlying metal of an abutment. As research from PMC highlights, “The shape of the implant where it meets the gum is critical for both how the implant looks and how healthy it stays over time.” For patients with a thin biotype, consider using implants with a platform-switched design or choosing restorative materials like zirconia that have a more natural shade. Matching the implant and abutment choice to the patient’s specific anatomy is fundamental for creating a stable and esthetically pleasing emergence profile that lasts.
Avoid Repeated Removal of Components
Every time a healing abutment or provisional is removed and reattached, it disrupts the delicate seal of the soft tissue around the implant. This repeated trauma can lead to tissue and bone loss, compromising the foundation you’re trying to build. This is why the “one abutment, one time” concept has gained so much traction. The goal is to minimize disturbances to the peri-implant tissues. As one study confirms, “It’s important to avoid taking the temporary crown or healing cap off and putting it back on many times, as this can cause the gum and bone around the implant to shrink.” By placing a definitive or custom temporary abutment early and making adjustments to the provisional crown outside of the mouth, you can preserve the tissue architecture and achieve a more stable, predictable result.
Emphasize Patient Care and Hygiene
Ultimately, the long-term success of an implant depends on the patient’s ability to maintain it. A poorly designed emergence profile can create food traps and areas that are difficult to clean, leading to plaque accumulation, inflammation, and potential peri-implantitis. A well-designed profile does the opposite. According to Nobel Biocare, “A good emergence profile helps the gums around the implant stay healthy, stops food from getting stuck, helps create natural-looking gum shapes between teeth, and makes it easier for patients to clean their teeth.” When designing the final restoration, always consider cleansability. The contours should be smooth and convex, allowing floss and brushes to easily access the entire circumference of the crown at the gumline, ensuring the implant remains healthy for years to come.
Common Challenges and Misconceptions
Even with the best intentions, creating the perfect emergence profile can present challenges. Common issues often stem from initial placement errors, misconceptions about restorative components, or a failure to fully utilize available technology. Many clinicians face difficulties with tissue collapse, unnatural-looking contours, or patient dissatisfaction with the final esthetics. Addressing these hurdles requires understanding the underlying causes and debunking some persistent myths within the field. By recognizing these common pitfalls, you can adjust your techniques and mindset to avoid them. This section will cover some of the most frequent challenges and clarify misconceptions, providing you with the insight needed to handle complex cases with greater confidence and success.
Avoiding Common Placement and Selection Errors
One of the most frequent mistakes is placing an implant too deep or too shallow, which severely limits your ability to shape the tissue properly. Another common error is relying on stock abutments for every case, as they often fail to match the patient’s specific gingival anatomy, leading to bulky or under-contoured restorations. The shape of the profile itself is also critical. For instance, research from the European Federation of Periodontology suggests, “Choosing a concave emergence profile can help prevent the gum from pulling back and promote more stable, healthier gum tissue,” especially in the esthetic zone. Taking the time to select the right components and plan the implant position meticulously is far more efficient than trying to correct a compromised situation later on.
Misconceptions About Custom Abutments
There’s a lingering belief that custom abutments are an unnecessary complication or an unjustifiable expense. As experts at Nobel Biocare point out, “Many people mistakenly believe that creating custom abutments for a good emergence profile is too difficult or costly.” In reality, a custom abutment is one of the most powerful tools for achieving an ideal outcome. It allows you to dictate the exact contour, margin placement, and material needed for each specific case. While it requires careful planning with your dental lab, the long-term benefits—superior esthetics, better tissue health, and improved cleansability—far outweigh the initial effort. Modern digital workflows have also made the process of designing and fabricating custom implant solutions more streamlined and accessible than ever before.
The Role of 3D Analysis
The idea that shaping an emergence profile is more art than science is quickly becoming outdated, thanks to advancements in digital technology. Modern 3D analysis tools have transformed our ability to design and evaluate these critical contours with incredible precision. A study in the Journal of Esthetic and Restorative Dentistry introduces “a new 3D way to measure the shape of dental implants where they come out of the gums.” This level of analysis allows clinicians and lab technicians to objectively assess and refine the emergence profile before the final restoration is ever made. This technology demystifies the process, making it easier to achieve predictable, repeatable results and reinforcing that custom abutments are a data-driven solution, not a complex luxury.
How Your Dental Lab Partner Impacts the Outcome
Not all labs are equipped to support nuanced implant restorations. That’s why we focus on collaboration—whether you need custom abutments, screw-retained provisionals, or layered zirconia crowns with ideal contours, we’ve got you covered. When you send us your scan or impression, our team helps ensure that the emergence profile implant strategy aligns with your clinical goals and patient expectations.
A Note on the 3/2 Rule for Dental Implants
When you’re planning a multi-unit implant case, spacing is everything. That’s where the 3/2 rule comes in as a foundational guideline for successful restorations. In short, it suggests that for every three teeth you’re replacing, two implants can provide sufficient support. This principle isn’t just about being efficient; it’s about creating a stable, long-lasting restoration by maximizing the use of available bone and preventing resorption between implants placed too closely. Following this rule helps ensure the final bridge has the structural integrity it needs to function properly for years, setting the stage for a successful outcome before the final restoration is even designed.
Beyond bone health, the 3/2 rule also plays a crucial role in soft tissue management, which ties directly back to creating that perfect emergence profile. The guideline recommends placing the implant shoulder about 3mm below the soft tissue, allowing for 2mm of facial soft tissue to form over it. This specific depth is key to preventing soft tissue collapse and helps the final restoration emerge from the gums in a way that looks completely natural. By giving the tissue enough volume and space, you can sculpt a contour that supports long-term health and aesthetics, making hygiene access easier for the patient and achieving a result that seamlessly blends with the surrounding dentition.
Ensure Long-Term Health and Aesthetics
Getting the emergence profile right isn’t just about appearances—it’s about protecting your implant investment for years to come. By taking the time to adjust it properly, you improve aesthetics, promote healthy tissue, and reduce complications down the road. At Next Dental Labs, we’re here to support your implant cases from planning through final delivery, with quality and pricing that keep your practice growing.
Frequently Asked Questions
Why can’t I just use a stock abutment for every implant case? Stock abutments are a one-size-fits-all solution for a situation that is rarely one-size-fits-all. Every patient’s gum tissue is unique, and a stock abutment often creates a contour that is too bulky or poorly shaped. This can lead to unnatural-looking results, pressure on the gums, and areas where plaque can easily accumulate. A custom abutment allows you to create the ideal shape for that specific patient, which supports healthier tissue and a much better aesthetic outcome.
When is the right time to start planning the emergence profile? The ideal time to plan the emergence profile is before the implant is even placed. When you begin with the end in mind, you can position the implant in a way that perfectly supports the final crown and the desired tissue shape. This approach, often called restoratively driven implant placement, helps you avoid many complications later on and makes the entire process more predictable.
What is a common cause of gum recession around an implant crown? While several factors can be involved, a poorly designed emergence profile is a frequent cause of gum recession. A profile that is too convex, meaning it curves outward too aggressively, puts constant pressure on the surrounding soft tissue. This pressure can restrict blood flow and eventually cause the gums to pull away from the crown, which compromises the final look and health of the implant.
How does a patient’s gum thickness influence the final restoration? A patient’s gum thickness, or biotype, is a critical piece of the puzzle. Patients with thick, robust gum tissue are generally more forgiving; their tissue is resilient and can better hide the underlying abutment. Thin tissue, on the other hand, is more delicate and prone to recession. It can also sometimes show the color of a metal abutment through the gums. For patients with a thin biotype, careful contouring and material choices, like a zirconia abutment, are essential.
How can a provisional crown help shape the final emergence profile? Think of a provisional crown as a training tool for the gums. It allows you to gently guide the soft tissue into the ideal shape over time. By strategically adding or removing material from the temporary crown, you can sculpt the gumline and support the papilla between the teeth. This step gives you incredible control over the final aesthetic outcome before the permanent restoration is fabricated.
Key Takeaways
- Prioritize tissue health for lasting aesthetics: A successful emergence profile is about more than just looks; it’s foundational to the long-term health of the implant. By carefully shaping the contour, you support the surrounding gum and bone, which prevents common issues like recession and inflammation.
- Tailor the profile shape to the tooth’s location: The ideal contour isn’t universal. Use a concave profile in the aesthetic zone to give soft tissue more room for a natural appearance, and opt for a straight profile on posterior teeth to prioritize function and easy cleaning.
- Shape the gums before the final crown: Don’t wait for the final seating to think about the gumline. Use tools like custom healing abutments and provisional crowns to proactively guide the tissue, creating more predictable and stable results from the start.