Nothing disrupts a carefully planned schedule like an unexpected equipment failure. A malfunctioning autoclave or a failing handpiece can bring your entire workflow to a halt, resulting in canceled appointments, frustrated staff, and lost revenue. Most of these emergencies are preventable. The key is shifting from a reactive mindset to a proactive one built on routine maintenance. Establishing a documented schedule for daily, weekly, and monthly tasks creates predictability and control over your practice’s operations. When you know how to properly care for your dental equipment, you minimize unexpected breakdowns and keep your focus where it belongs: on your patients.
Dental equipment represents a major investment for any practice. Yet, even advanced tools can underperform when maintenance habits fall short. Understanding how to properly care for your dental equipment helps protect your investment, supports patient safety, and reduces downtime. Routine care is not just about cleaning; it also involves proper handling, organized storage, and regular inspection. When you maintain your tools with attention and consistency, your practice operates more efficiently and your patients benefit from safer, higher-quality care.
Are Your Sterilization Habits Putting Patients at Risk?
 Sterilization forms the backbone of every dental procedure. When tools or surfaces are not disinfected correctly, the risk of contamination increases. Using the right cleaning agents and disinfectant solutions is fundamental for preventing infection. It is also important to separate receiving, cleaning, and storage areas in your sterilization zone. Keeping sterile and contaminated tools apart minimizes cross-contamination. Staff should wear protective gear, including gloves and face shields, to handle sterilization safely. Consistent weekly spore testing confirms that autoclaves and other sterilization units are performing properly.
Instrument Classification: A Risk-Based Approach
Not all dental instruments carry the same risk of infection, so they don’t all require the same level of processing. The Centers for Disease Control and Prevention (CDC) recommends a risk-based approach to classify instruments, which helps streamline your workflow and ensures patient safety. This system categorizes items as critical, semicritical, or noncritical based on how they are used. Understanding these categories is the first step in creating an effective and efficient sterilization protocol. It ensures that the most invasive tools receive the highest level of decontamination, while other items are cleaned appropriately without wasting time or resources.
Critical and Semicritical Items
Critical items are those that penetrate soft tissue or bone, such as surgical instruments and scalers. These tools present the highest risk of infection and must be sterilized with heat after every use. Semicritical items, like mouth mirrors and impression trays, touch mucous membranes but do not penetrate tissue. The CDC strongly recommends that these items also undergo heat sterilization. If a semicritical instrument is heat-sensitive and cannot be sterilized, it should be processed using a high-level disinfectant. Prioritizing heat sterilization for both categories is the most reliable way to prevent cross-contamination and protect your patients.
Noncritical Items
Noncritical items are surfaces or equipment that only come into contact with intact skin, posing the lowest risk of transmission. This category includes things like X-ray heads, blood pressure cuffs, and countertops. These items do not require sterilization. Instead, they should be cleaned with soap and water or cleaned and then disinfected using a hospital-grade disinfectant between patients. Establishing a clear protocol for these items ensures your team can work efficiently while maintaining a safe and clean environment for everyone in the practice.
The Step-by-Step Sterilization Process
A successful sterilization process is a systematic workflow, not a single action. Each step builds on the last to ensure instruments are completely free of microorganisms before they are used on the next patient. From initial cleaning to final storage, following a consistent, documented procedure eliminates guesswork and reduces the chance of human error. This methodical approach not only meets regulatory standards but also builds a culture of safety within your practice. When every team member understands and follows the same process, you can be confident in the sterility of your instruments every time.
Step 1: Cleaning Before Sterilizing
You can’t sterilize a dirty instrument. Before any tool enters the autoclave, it must be thoroughly cleaned to remove all visible debris, such as blood and saliva. This pre-cleaning step is non-negotiable because organic material can shield microorganisms from the heat or chemical sterilants, rendering the process ineffective. Use an ultrasonic cleaner or a washer-disinfector to achieve a consistent clean while minimizing direct handling of contaminated instruments. If you must clean by hand, always wear heavy-duty gloves and use long-handled brushes to protect yourself from sharps injuries.
Step 2: Drying, Packaging, and Labeling
Once instruments are clean, they need to be dried completely, inspected for any remaining debris, and packaged for sterilization. Proper packaging in pouches or wraps maintains sterility after the instruments leave the autoclave. It’s also crucial to label each package with key information, including the sterilizer used, the cycle number, and the date of sterilization. This simple habit is essential for quality control and makes it easy to retrieve a specific load in the unlikely event of a sterilization failure, ensuring you can quickly identify and reprocess any affected instruments.
Step 3: Loading the Autoclave Correctly
How you load your autoclave is just as important as what you put inside it. One of the most common reasons for sterilization failure is overloading the chamber. When packages are packed too tightly or stacked on top of each other, the sterilizing agent—typically steam—cannot circulate freely and reach every surface. To ensure effective sterilization, place pouches on their edges in racks and arrange cassettes so they don’t touch. This allows for proper steam penetration and helps guarantee that every instrument inside is completely sterilized and ready for safe use.
Consistent Monitoring for Guaranteed Sterility
Sterilization is a process that requires constant verification. You can’t just assume your autoclave is working correctly; you need to prove it. Consistent monitoring with a combination of mechanical, chemical, and biological indicators provides the quality assurance needed to protect your patients and your practice. This multi-faceted approach confirms that your sterilization equipment is reaching the necessary parameters for every cycle. It also creates a detailed record of performance, which is invaluable for internal audits and regulatory compliance.
Mechanical and Chemical Indicators
Think of mechanical and chemical indicators as your daily check-ins. Mechanical indicators are the gauges and displays on the sterilizer that show the time, temperature, and pressure for each cycle. You should check these with every load. Chemical indicators, such as strips or tape, are placed inside or outside of packs and change color when exposed to specific temperatures. While these indicators confirm that the sterilizer reached the right conditions, they don’t prove that sterilization was successful. They are an essential part of the daily monitoring process but are not a substitute for biological testing.
Biological Indicators (Spore Tests)
Biological indicators, or spore tests, are the gold standard for verifying sterilization. These tests use vials of highly resistant bacterial spores to challenge the autoclave’s ability to kill microorganisms. If the sterilizer can kill these tough spores, you can be confident it is effective against all other bacteria and viruses. The CDC recommends performing a spore test at least once a week to confirm your equipment is functioning properly. Integrating this into your weekly routine is the most definitive way to ensure your instruments are truly sterile and safe for patient care.
The Importance of Record Keeping
Meticulous record-keeping ties your entire sterilization monitoring process together. Maintain a detailed logbook for each sterilizer, documenting the results of every mechanical, chemical, and biological indicator test. This log should also include information on equipment maintenance and any sterilization failures. These records are crucial for troubleshooting and provide tangible proof of your commitment to safety. As practices increasingly adopt digital workflows for everything from patient records to lab submissions, maintaining precise sterilization logs fits perfectly into a modern, efficient, and quality-focused operation. Just as you might submit digital cases for accuracy, you should keep digital or physical logs for compliance.
Is Old Equipment Holding Your Practice Back?
Relying on equipment that is more than a decade old can impact patient care and productivity. Out-of-date machines are prone to breakdowns, often lack modern features, and may no longer meet regulatory standards. Regularly reviewing your equipment inventory helps you identify tools that need repair or replacement. Upgrading to modern systems, such as dental lab products designed for precision and reliability, helps you stay aligned with today’s performance expectations. Well-maintained and current equipment also enhances energy efficiency, saving long-term operational costs.
Beyond Instruments: Mastering Operatory Surface Disinfection
While sterile instruments are non-negotiable, the surfaces surrounding the patient chair deserve just as much attention. From countertops to light handles, your operatory is filled with potential points of cross-contamination that can undermine your best sterilization efforts. A comprehensive infection control plan looks beyond the autoclave and considers every surface a patient or team member might touch. Establishing a consistent and thorough protocol for surface disinfection is crucial for protecting your patients, your staff, and the reputation of your practice. It’s a fundamental part of creating a safe environment where patients feel confident and cared for.
Identifying Clinical Contact Surfaces
The key to effective surface disinfection is knowing where to focus your efforts. The CDC calls these high-touch areas “clinical contact surfaces.” Think about all the things you and your team touch during a procedure: the dental light handle, chair switches, drawer pulls, and even the computer keyboard and mouse. Because these surfaces are frequently touched with gloved hands, they can easily transfer microorganisms. That’s why it’s so important to have a clear system in place. Always clean these surfaces first to remove any visible soil or debris, as this physical step is necessary for the disinfectant to work effectively.
Using Barriers and EPA-Registered Disinfectants
You have two solid strategies for managing clinical contact surfaces: barriers and disinfectants. Protective barriers, like plastic wraps or covers, are an excellent choice for surfaces that are difficult to clean, such as switches or keyboards. The rule is simple: place a new barrier for every patient and dispose of the old one carefully. If you choose not to use barriers, you’ll need to clean and disinfect these surfaces between each appointment. According to CDC guidelines, you should use an EPA-registered hospital disinfectant. If any surface is visibly contaminated with blood, the protocol requires an intermediate-level disinfectant with a tuberculocidal claim.
Simple Storage Fixes for a Safer Practice
Incorrect storage is another common mistake that affects both hygiene and efficiency. Instruments that have been sterilized must be kept in dry, enclosed areas away from sinks or operatories. Moisture exposure can compromise the sterility of supplies like cotton rolls or sponges. Creating labeled storage sections for sterilized and non-sterilized tools supports easy organization and safety. Using closed cabinets or sealed containers reduces the risk of accidental contamination. A clean, structured storage system reflects a practice that values both patient health and professional integrity.
Your Essential Dental Equipment Maintenance Checklist
Proper maintenance keeps your equipment functioning at peak performance. Neglecting this step often leads to more frequent repairs and shorter equipment lifespan. Daily and weekly cleaning schedules should be documented and followed closely. For example, turn off vacuums and air systems at closing, refill ultrasonic cleaners daily, and clean delivery unit traps weekly. Checking handpiece gaskets and lubricating components helps prevent mechanical wear. Regular inspections and calibration of X-ray machines and autoclaves guarantee accuracy and safety for every procedure.
Developing a Maintenance Schedule
Creating a proactive maintenance schedule is one of the most effective ways to protect your practice’s investments. Addressing equipment care before a breakdown occurs is the foundation of a smoothly running office. This preventative approach helps extend the life of your valuable tools and significantly reduces the chance of unexpected, costly emergency repairs that can disrupt your patient schedule. By documenting and assigning daily, weekly, and monthly tasks, you create a system of accountability that keeps your equipment in optimal condition and your practice operating without interruption.
Specific Maintenance Tasks by Equipment
While a general checklist is a great start, your most critical equipment requires specific, routine attention to function correctly and safely. Different tools have unique maintenance needs based on their design and use. Breaking down your schedule by equipment type ensures that nothing gets overlooked, from the sterilization center to the operatory. Here are some key tasks to incorporate into your regular maintenance plan for the workhorses of your practice.
Autoclave and Sterilizers
Your autoclave is central to patient safety, and its maintenance is non-negotiable. To keep it running effectively, drain the water reservoir at least once a week to prevent mineral buildup. Once a month, give the chamber a thorough cleaning with a recommended autoclave cleaner. At the same time, check the door gasket for wear and flip it to ensure a proper seal. Finally, plan to replace the sterilizer’s filters annually to maintain its performance and protect its internal components from debris.
Water Lines and Vacuum Systems
Clean water lines are essential for preventing biofilm accumulation and protecting patient health. A simple but crucial habit is to flush all water lines for 20 to 30 seconds between every patient. On a daily basis, use a dedicated water line treatment product to keep microbes at bay. Once a month, perform a shock treatment to deep clean the system. Don’t forget to drain the water bottle weekly and replace water filters whenever you notice a decrease in water flow.
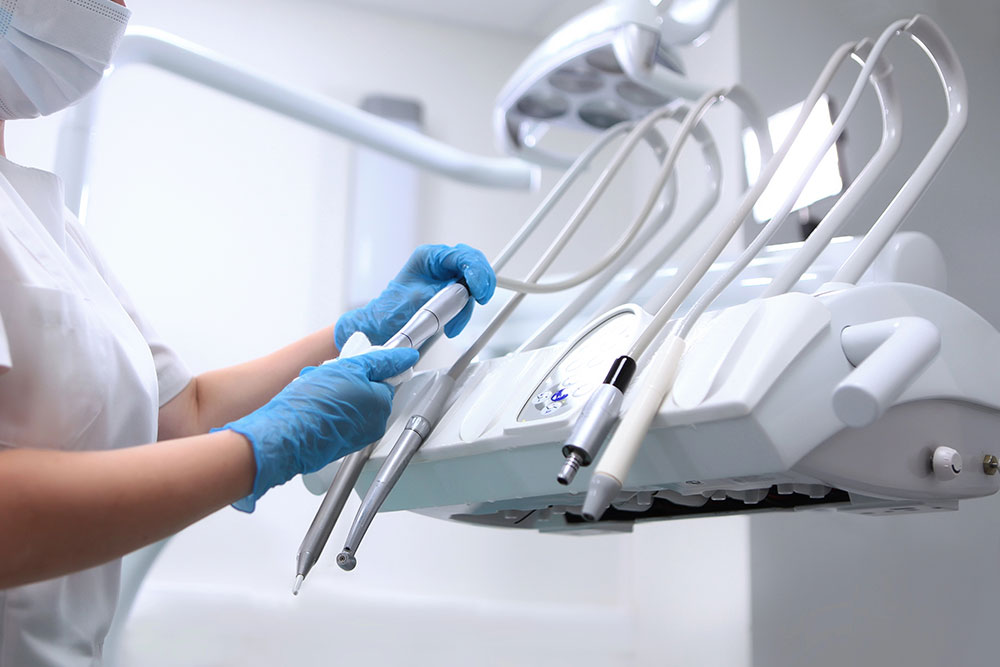
Dental Handpieces
Your dental handpieces are in constant use, and their longevity depends on consistent care. The most important task is ensuring they are properly lubricated according to the manufacturer’s instructions, especially if they are not lube-free models. This simple step minimizes internal wear and tear from friction and heat. Additionally, make it a point to change the aerosol filter once a year, or sooner if you notice any oil dripping, to ensure the handpiece operates efficiently and cleanly.
X-Ray Equipment
Diagnostic accuracy begins with well-maintained imaging equipment. Schedule a yearly professional check to confirm your X-ray machines are functioning correctly and safely. For 3D units, perform monthly quality assurance tests to verify image consistency. Annual calibration is also critical for ensuring your machines deliver precise exposures every time. This level of care guarantees you capture the clear, accurate images needed for effective treatment planning and for submitting high-quality digital cases to your lab partner.
Scheduling Annual Professional Service
Even with a diligent in-office maintenance schedule, it’s wise to have a professional technician service your equipment at least once a year. These experts can perform diagnostics, calibrations, and repairs that go beyond routine upkeep. They are trained to spot early signs of wear or potential failure that your team might miss. Think of it as an annual physical for your practice’s most important assets. This professional check-up provides peace of mind and helps you avoid major issues down the road, ensuring your practice remains productive and safe.
Are You Using the Right Tool for the Job?
Choosing incorrect instruments for specific procedures can cause complications during treatment. It may lead to discomfort for patients, reduced accuracy, or even damage to the instruments themselves. Reviewing each case with your team before treatment helps avoid these errors. Organize instruments based on procedures to save time and maintain smooth workflow. When your team understands which tools align with each treatment type, you strengthen both efficiency and outcomes.
What Your Equipment Says About Your Practice
Equipment care goes beyond function; it reflects true professionalism. Patients trust practices that maintain clean, efficient, and safe workspaces. Poorly handled or outdated equipment can harm your reputation and even lead to compliance issues. Consistent care and maintenance not only protect patient health but also create a smoother operational flow. When your tools perform as they should, procedures are faster, more accurate, and more comfortable for patients.
Support Your Practice with Reliable Lab Solutions
At Next Dental Lab, we understand how proper equipment care supports exceptional dentistry. Our advanced dental implants and other lab solutions are built to match your precision standards and workflow needs. We work closely with dental professionals who value reliability, accuracy, and long-term performance. Partner with us to access dependable materials and expert craftsmanship that help your practice operate efficiently and deliver lasting patient satisfaction.
Frequently Asked Questions
What’s the single biggest mistake practices make with their autoclave? One of the most common and critical errors is overloading the sterilizer. It’s tempting to pack as much as possible into one cycle to save time, but when instruments are crammed together, steam can’t circulate properly. This means some surfaces may not reach the required temperature for the necessary amount of time, leading to a failed cycle. The best practice is to place pouches on their edges in a rack and give cassettes enough space so they aren’t touching.
Why is cleaning instruments so important if they’re going to be sterilized anyway? Think of it this way: you can’t sterilize a dirty instrument. Any visible debris, like blood or saliva, can act as a shield that protects microorganisms from the heat or chemical sterilant. The sterilization process is only effective on a clean surface. Taking the time to thoroughly clean instruments first, ideally with an ultrasonic cleaner, is a non-negotiable step that ensures the autoclave can do its job effectively.
Are weekly spore tests really necessary if my chemical indicators always pass? Yes, they are absolutely essential. A chemical indicator strip simply confirms that the autoclave reached a specific temperature. It doesn’t prove that it killed any microorganisms. A biological indicator, or spore test, is the only way to verify that the sterilization process was actually successful. It challenges the machine with highly resistant spores, giving you definitive proof that your equipment is keeping patients safe.
My instruments are sterile. Why do I need to worry so much about disinfecting countertops and light handles? While your instruments may be sterile, the surfaces around the dental chair are high-touch areas that can easily lead to cross-contamination. During a procedure, gloved hands touch everything from the chair controls and light handles to drawer pulls. Without proper disinfection between patients, microbes can transfer from these surfaces. A thorough surface disinfection protocol protects the entire clinical environment, not just the sterile field.
I want to create a maintenance schedule but don’t know where to start. Any advice? The best place to start is with the manufacturer’s guidelines for your most critical pieces of equipment. Begin by creating a simple checklist for your autoclave, handpieces, and vacuum system. Break tasks down into daily, weekly, and monthly duties and assign them to specific team members. Documenting everything in a logbook creates accountability and turns routine maintenance into a consistent, manageable habit for the whole team.
Key Takeaways
- Master the full sterilization workflow: Effective sterilization is a multi-step process that begins long before the autoclave. Always pre-clean instruments, use proper packaging, and load the sterilizer correctly to ensure complete steam penetration and guaranteed sterility.
- Create a routine maintenance plan: Shift from reactive repairs to proactive care by scheduling daily, weekly, and monthly tasks for your key equipment. This approach protects your investment, minimizes downtime, and keeps your office operating predictably.
- Disinfect beyond the instruments: A truly safe environment includes every clinical surface. Regularly disinfect high-touch areas like light handles and countertops, and use barriers on hard-to-clean equipment to prevent cross-contamination between patients.