
Step-by-Step Guide to Veneer Preparation
Veneer preparation creates the restorative space and margin geometry needed for an accurately fitting ceramic veneer while preserving enamel wherever possible. A sound workflow starts with the intended restoration, not a standard reduction depth applied to every tooth. This veneer preparation guide connects clinical planning, controlled reduction, and laboratory communication for dentists managing anterior ceramic cases. (onlinelibrary.wiley.com)
This article is part of our complete guide to veneer preparation, which covers, material selection, shade matching, and more.
How should dentists approach veneer preparation step by step?
Plan the final contours, verify them with a diagnostic mock-up, and prepare only the space required for the selected ceramic and fabrication method. Then refine the margins, evaluate the bonding substrate, capture complete records, and communicate the approved design to the laboratory. Mock-up-driven preparation provides a reference for reduction relative to the proposed restoration rather than the existing tooth surface alone. (onlinelibrary.wiley.com)
1. Assess the substrate and restorative requirements
Evaluate remaining enamel, existing restorations, tooth position, discoloration, periodontal conditions, and functional contacts before committing to the preparation design. Record where the proposed restoration will be additive and where reduction is necessary. Clinical research associates extensive dentin exposure with poorer veneer survival, making substrate assessment a planning priority rather than a final inspection task. (pubmed.ncbi.nlm.nih.gov)
Use the assessment to identify constraints requiring laboratory input. A severely discolored tooth, for example, requires an explicit masking strategy rather than an assumption that the selected shade will conceal the substrate. Document the target shade and preparation shade separately so the ceramist can evaluate the underlying color when selecting the restorative approach. (ivoclar.com)
2. Establish the final contours with a wax-up and mock-up
Develop a conventional or digital diagnostic wax-up that defines the proposed facial contour, incisal position, and proximal form. Transfer the design intraorally and evaluate the planned result before using it as the preparation reference. The key distinction is that reduction follows the intended restorative envelope, including areas where the final veneer adds volume. (onlinelibrary.wiley.com)
Create sectioned reduction indices from the approved design. Recommend checking the cervical, middle, and incisal regions independently rather than relying on one facial view. Where the mock-up has been adjusted, retain the revised design as the reference for subsequent preparation checks and laboratory communication. (onlinelibrary.wiley.com)
3. Confirm material requirements before cutting
Agree on the ceramic system and whether the laboratory will press, mill, or use another indicated fabrication technique. Follow the applicable manufacturer’s instructions for minimum restoration thickness and preparation geometry. Do not transfer a thin-veneer specification to a different material or assume that minimum ceramic thickness equals the amount of tooth structure to remove. (mountaindentallab.com)
For example, Ivoclar’s published IPS e.max clinical guide distinguishes thin pressed veneers from thin CAD veneers and conventional veneers. Those distinctions illustrate why a universal reduction number is inappropriate. Check the applicable instructions for the selected product, then use the mock-up to determine how much of that space already exists outside the original tooth contour. (mountaindentallab.com)
4. Place depth grooves and reduce the facial surface
Use depth-orientation grooves referenced to the approved mock-up where appropriate. Join the grooves progressively while maintaining the facial contour across the cervical, middle, and incisal regions. A mock-up-guided approach accounts for planned additions and can help avoid unnecessary reduction of an already worn tooth. (onlinelibrary.wiley.com)
Pause during reduction to check space with the indices rather than completing the entire preparation by eye. Treat a residual area of insufficient space as a localized finding, not an instruction to deepen the whole facial surface. Preserve enamel wherever possible; clinical studies identify the extent of dentin exposure as a relevant factor in veneer failure. (mountaindentallab.com)
5. Refine cervical and proximal margins
Create a continuous, clearly identifiable finish line suited to the selected ceramic. Manufacturer guidance commonly specifies rounded internal transitions and avoidance of sharp edges. For Celtra Press, for example, a chamfer or rounded-shoulder preparation is recommended for veneer margins; use product-specific guidance rather than importing full-crown dimensions into a veneer preparation. (lp.dentsplysirona.com)
Do not open proximal contacts automatically. Ivoclar’s veneer guidance states that proximal contact opening is not inherently required. Decide the extension from the intended restoration and access requirements, then verify that the margin is identifiable and the planned veneer can be fabricated without an ambiguous proximal termination. (dnsdental.com)
6. Select the incisal design from the case requirements
Choose whether to preserve or reduce the incisal edge according to the intended length, available restorative space, material requirements, and functional contacts. Avoid positioning the incisal preparation margin on an abrasion surface or dynamic contact area where the selected manufacturer’s guidance advises against it. Map contacts against the proposed restoration, not only the original tooth. (dentek.com.tr)
Do not describe one incisal configuration as universally superior. A clinical study comparing incisal bevel and overlap preparations did not find a statistically significant survival difference between those designs during its follow-up. The practical implication is to justify the design for the individual case rather than apply an overlap routinely. (pubmed.ncbi.nlm.nih.gov)
7. Inspect the substrate and finalize surface geometry
After reduction, inspect for exposed dentin, existing composite interfaces, sharp transitions, and inadequate restorative space. Record substrate changes rather than assuming that the initial enamel assessment still applies. Extensive dentin exposure deserves particular attention because clinical studies associate it with increased failure risk compared with enamel-confined preparation. (pubmed.ncbi.nlm.nih.gov)
Consider immediate dentin sealing when dentin exposure warrants it, using a defined adhesive protocol compatible with subsequent treatment stages. An eleven-year prospective clinical study found a benefit from immediate dentin sealing in teeth with substantial dentin exposure. This supports considering the technique; it does not justify additional reduction or treating sealing as a replacement for enamel preservation. (pubmed.ncbi.nlm.nih.gov)
Before recording the preparation, use a consistent inspection sequence:
- Restorative space: Check the preparation against the approved contour and applicable material requirements.
- Margins: Confirm a continuous, readable finish line without unsupported or unclear transitions.
- Surface geometry: Remove sharp edges and verify that the form suits the fabrication method.
- Substrate: Identify dentin and restorative interfaces that affect the planned bonding protocol. (lp.dentsplysirona.com)
8. Capture definitive records and plan provisionalization
For a conventional impression, obtain clear reproduction of the preparation margins and surrounding detail. For a digital workflow, inspect the preparation record before submission rather than assuming that a complete-looking arch contains sufficient margin information. Include the opposing arch and the occlusal relationship required for fabrication. (mountaindentallab.com)
Plan provisionalization alongside the adhesive workflow, particularly when immediate dentin sealing has been used. Keep the approved contour available for provisional fabrication and communicate any subsequent changes to the laboratory. The definitive restoration should follow the clinically verified design rather than an earlier version that no longer represents the preparation appointment. (pure.rug.nl)
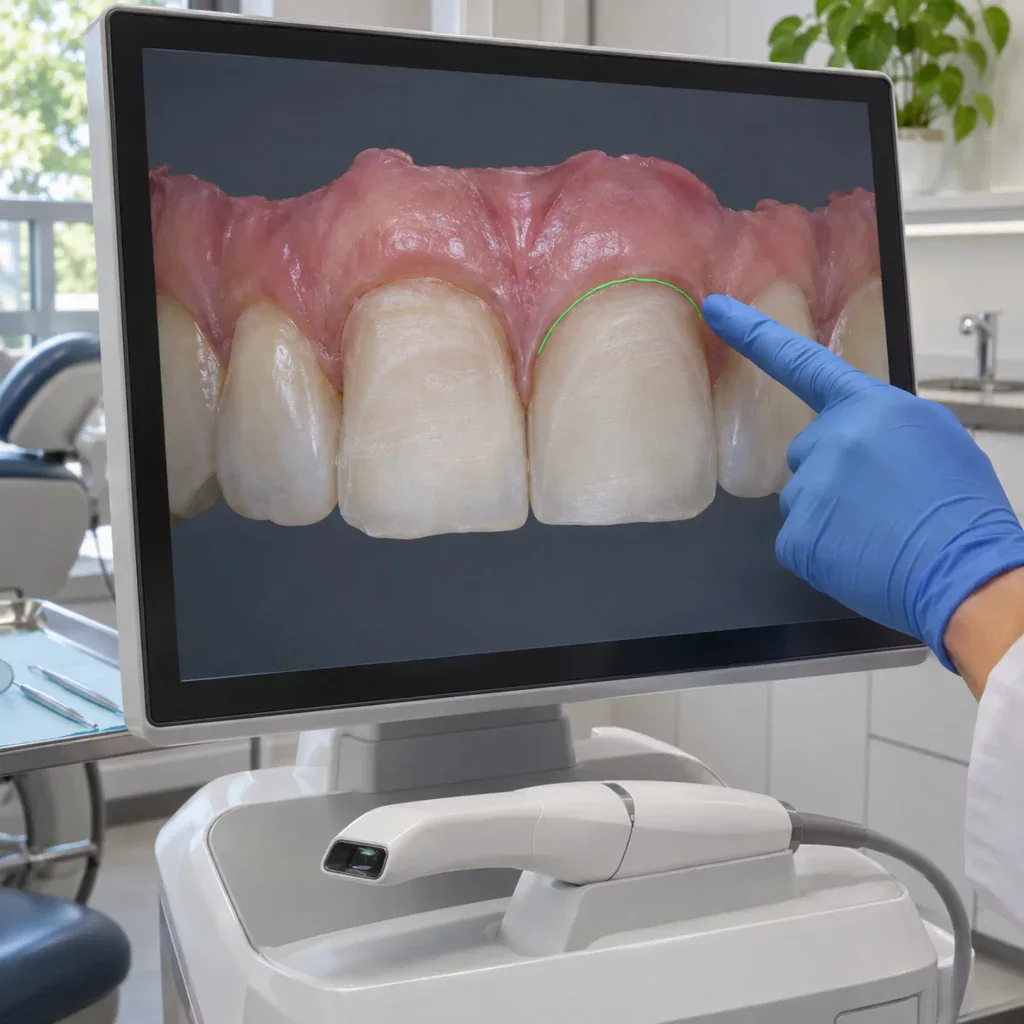
What information should the laboratory receive after preparation?
The laboratory should receive the definitive preparation record, the approved restorative design, shade information, and clear instructions identifying any changes made during preparation. Distinguish the desired restoration shade from the prepared tooth shade. Manufacturer guidance specifically recognizes preparation shade as relevant to the optical result of an all-ceramic restoration. (mountaindentallab.com)
Use a standardized submission checklist:
- Design reference: Approved wax-up, mock-up, or provisional record, with revised contours clearly identified.
- Preparation records: Definitive scan or impression, opposing arch, and occlusal relationship.
- Shade records: Desired shade and preparation shade, with photographs showing the relevant shade reference.
- Material prescription: Selected ceramic, fabrication approach, and any masking requirements discussed before preparation.
- Clinical changes: Incisal adjustments, exposed substrate, and departures from the original plan that require technician review. (mountaindentallab.com)
As a practical communication rule, resolve uncertainty before fabrication. Ask the laboratory to confirm any unclear margin, space limitation, or mismatch between the prescription and reference design. Treat that exchange as part of the step-by-step veneer preparation workflow, not an administrative task after it.
Key takeaway
Controlled preparation begins with the final restoration and preserves enamel wherever feasible. Use the approved design to guide reduction, follow material-specific requirements, and verify the substrate before transferring the case. Combine those clinical checks with a consistent laboratory submission process so the ceramist receives a clear, clinically verified prescription. (onlinelibrary.wiley.com)

